To assist my geocaching endeavors, I often make use of several software programs to help organize and display cache information in ways that I need it. This is a list of my favorite programs and ones that I think really have caching potential.
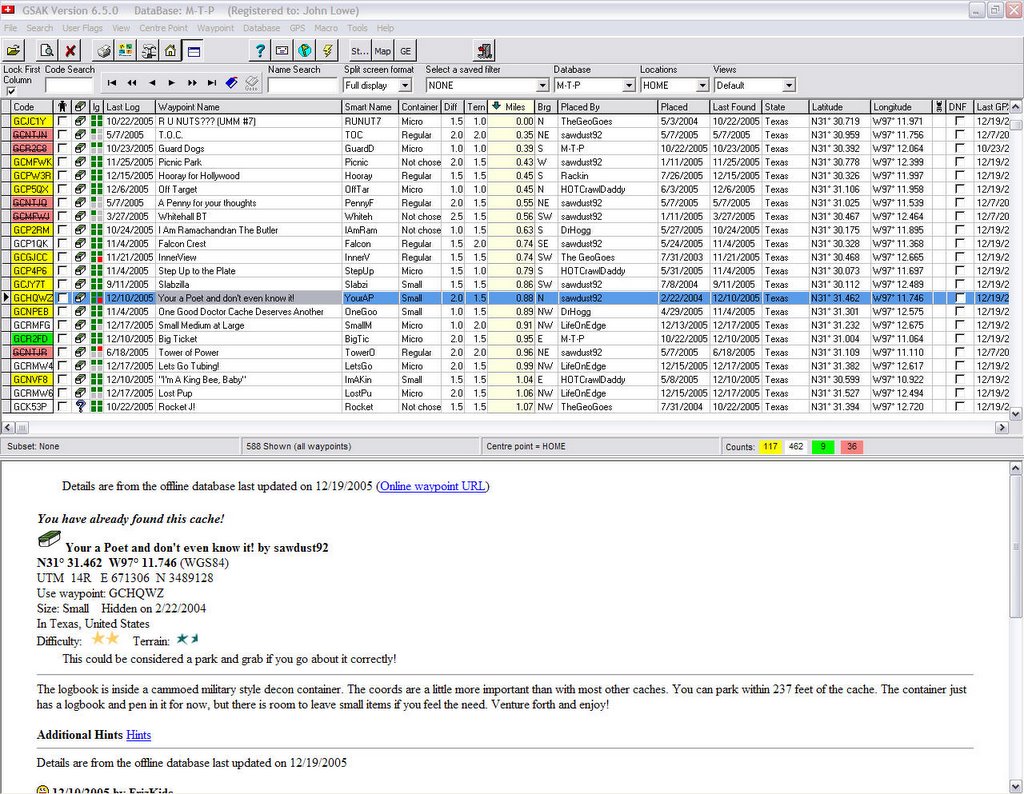
GSAK
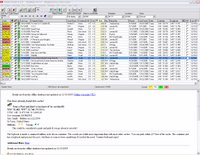 Geocaching Swiss Army Knife
 (GSAK) is an all-in-one GPX and waypoint managing system. It allows users to quickly download pocket query GPX files from email, load them into multiple databases, organize and sort waypoints by distance or location, view target locations on various online maps, and send the waypoints directly to your PDA or GPS receiver. GSAK automatically queries GPX files and color codes waypoints by Found/Not Found/Hidden/Unavailable. If you are looking for a program to help with waypoint management and GPS receiver transfers, this is the program to have. Registration for this program is just $20 and is worth every penny!
Geocaching Value:
CacheMate
 CacheMate
 is a program written for users of Palm-based PDA devices. This program allows PDA equipped Geocachers to take critical information with them into the field. CacheMate provides fingertip access to cache descriptions, decoded hints, and even previous log entries generated from GPX files or directly from GSAK. CacheMate has built-in sorting capabilities and can find nearby caches from any position by entering your current coordinates. Although I do not use CacheMate for this purpose, it can also be used to compose log entries in the field and keep a record of found caches and DNFs. For Geocachers who are looking to go paperless, this is the perfect solution and can be registered for only $8.
Geocaching Value:


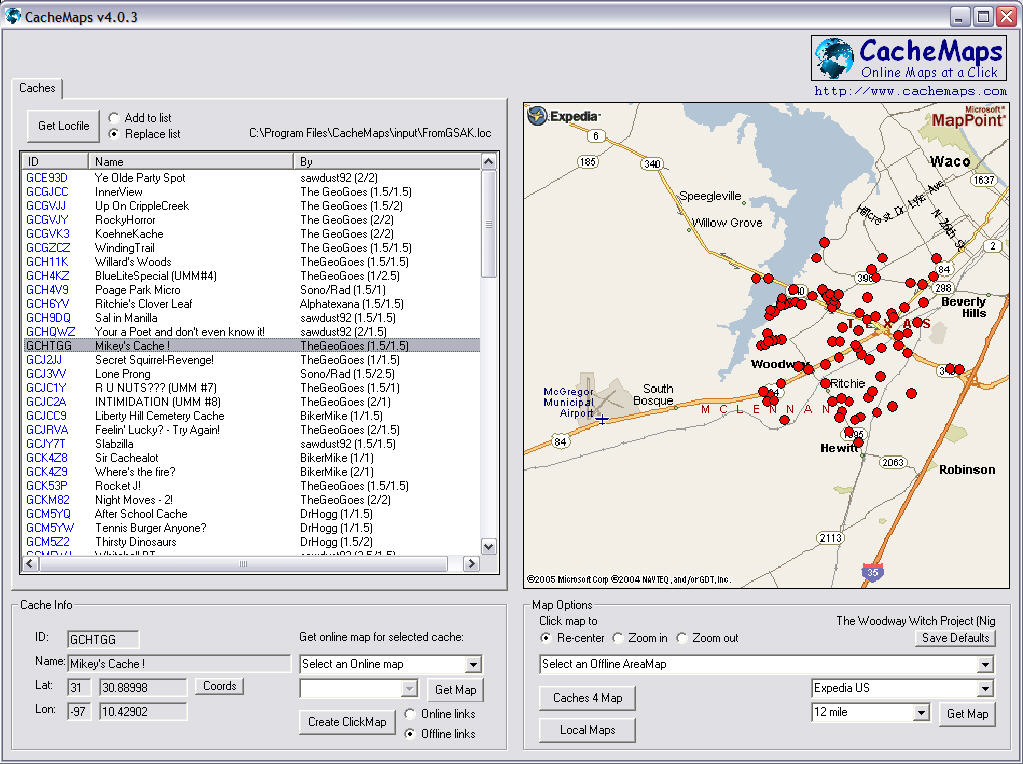
CacheMaps
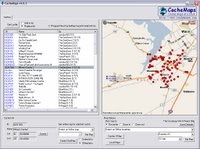 CacheMaps
 is a new discovery for me recently and one that I haven't had the opportunity to use in the field yet. It allows Geocachers to load an LOC file from GSAK or directly from geocaching.com and display those coordinates on online maps. However, its most useful feature for me is its offline map capabilities. Any map including its location, zoom, and cache position are automatically stored locally on your hard drive and are available at anytime even where there is no active Internet connection. This program allows Geocachers to browse through active cache lists and view current MapQuest or Expedia road maps even without an Internet connection while on geocaching road trips. Offline support for map services is currently limited in the United States to MapQuest and Expedia, but numerous online maps are available including Google maps. This program is currently marketed as donateware and you are able to purchase a registered version for any donation amount that you choose. Better get this one early while it's still improving and cheap!
Geocaching Value:

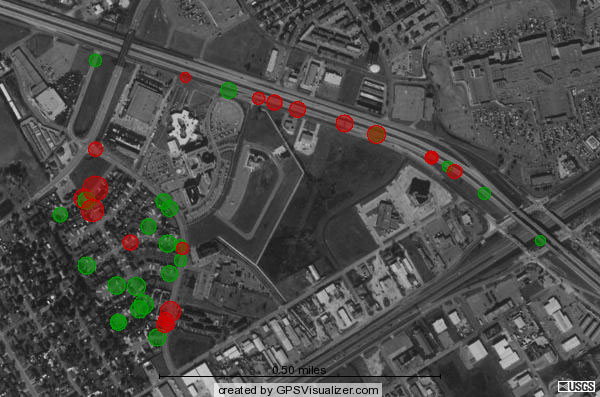
Google Earth
 Google Earth
 is a 3D global mapping program originally developed by Keyhole and is now being released for free by Google. Its primary function is to display satellite and aerial photographs of the entire planet on a 3D model of the Earth. Using these photos, users can fly around the globe and view detailed images of almost any destination. It has particular value to Geocachers because you can either generate a KMZ file directly from GSAK or drag and drop any GPX file downloaded from Geocaching.com and fly to the cache location virtually. Once you are viewing a location, you can pan, tilt, and zoom in further to help identify the exact cache location. In addition, Google Earth supports image or network overlays. With overlays, you can have trail maps, topographical maps, or other useful information display in Google Earth on top of your satellite image which can really assist Geocachers in finding their way to the cache location. Google Earth is so effective in some instances that I've actually used it to find a cache without ever turning on my GPS receiver! Best of all, the basic version of Google Earth is FREE!
Geocaching Value:
GPX to Google Map Creator
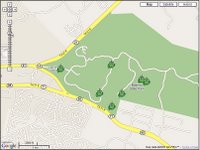 GPX to Google Map Creator
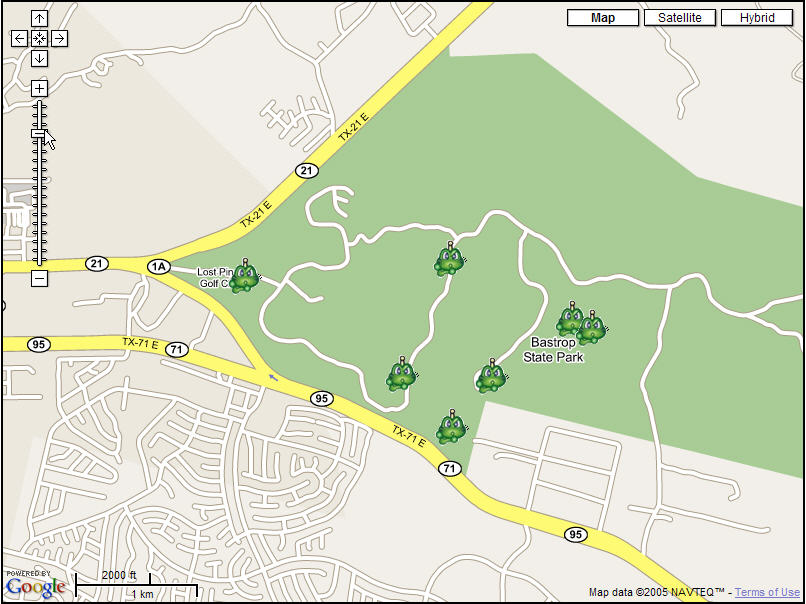
 is a really nice little program that allows users to easily upload GPX files created with GSAK or downloaded from Geocaching.com and display them in an online version of Google Maps. The map detail with Google Maps is not quite as high as it is with Google Earth, but these maps can be included on web pages and used by people without Windows XP. This program also allows Geocachers to display their tracks captured from a GPS receiver with
GPSBabel. It is a great program for Geocachers to use for providing fully interactive maps of geocaching trips on personal websites or for printing out in advance of a geocaching trip. Caches are displayed on the Google maps with a Signal-the-Frog icon. This is an excellent little program that deserves 5 stars for its functionality even though its value to typical Geocachers is slightly lower than the other programs mentioned here.
Geocaching Value:


